Mindless
Building FreeBSD from source
This method is outdated see notes for more current information or just read updating and upgrading section of FBSD handbook!
best way to update freebsd is to grab source, build and install - bsd makes this task rather simple.
First you wanna grab the source - i recommend stable, which newest stable at this point is 12, stable on
freebsd is almost bleeding edge, current is active dev.
Ive run current as a main driver for long chunks of time, it rarely breaks to an extreme, but expect some
breaks if you are going that route.
Freebsd uses svn git:
$svnlite co https://svn.FreeBSD.org/stable/12 /usr/src
//Too update
$git pull --ff-only -C /usr/src
//too initially clone
$git clone -o ssh://anongit@git.freebsd.org/src.git /usr/src
default kernel it will build has debugging and such enabled, you probably dont want this - you can use.
Also you should edit your /etc/src.conf
add this to /etc/src.conf
replace amd64 with your own architecture
$cp /usr/src/sys/amd64/conf/GENERIC-NODEBUG /usr/src/sys/amd64/conf/CUSTOM
$echo "options LOCK_PROFILING" >> /usr/src/amd64/conf/CUSTOM
also optional open up and edit and change IDENT string in custom
then its as simple as
$cd /usr/src
$make -DMALLOC_PRODUCTION -j4 buildworld
$make -DMALLOC_PRODUCTION -j4 buildkernel KERNCONF=CUSTOM
$make -j4 installkernel KERNCONF=CUSTOM
$shutdown -r now
boot into single user mode(this assumes you are using zfs):
$zfs mount -a
$zfs set readonly=off zroot/ROOT/default
$cd /usr/src
$mergemaster -Fp
$make -j4 installworld
$mergemaster -Fi
$make check-old
$make delete-old
$make check-old-libs
$make delete-old-libs
$shutdown -r now
and thats it -
here are the scripts i use to stay upto date
mouse@mousestep ~ % cat /bin/update_build_base [0]
#!/bin/sh
cd /usr/src
make cleanworld && make clean
svnlite up /usr/src
git pull --ff-only -C /usr/src

printf "check updating?"
read chkupdating
if [ $chkupdating == "y" ]; then
pico /usr/src/UPDATING
fi

printf "build world?"
read bworld
if [ $bworld == "y" ]; then
make -j4 -DMALLOC_PRODUCTION buildworld
fi

printf "build kernel?"
read bkernel
if [ $bkernel == "y" ]; then
make -j4 -DMALLOC_PRODUCTION buildkernel KERNCONF=CUSTOM
fi

printf "install kernel?"
read ikernel
if [ $ikernel == "y" ]; then
make -j4 installkernel KERNCONF=CUSTOM
fi
mouse@mousestep ~ % cat /bin/singlefix [0]
#!/bin/sh
zfs mount -a
zfs set readonly=off mouser/ROOT/default
mouse@mousestep ~ % cat /bin/finish [0]
#!/bin/sh
singlefix
cd /usr/src
mergemaster -Fp
make -j4 installworld
printf "install world succeded?"
read isuccess
if [ $isuccess == "y" ]; then
mergemaster -Fi
make check-old
make delete-old
make check-old-libs
make delete-old-libs
fi
printf "Reboot?"
read reboot
if [ $reboot == "y" ]; then
echo "ok bye bye. time for smoke test!"
shutdown -r now
fi
The Beefiest Windows 95 VM
In this article I will show you how to create the beefiest Windows 95 Virtual Machine Ever first get the
necessary software:
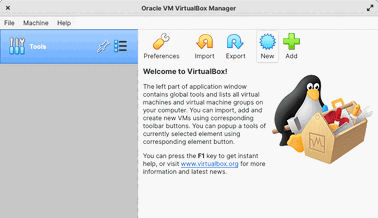
First, install Virtual Box:
I am running a Ubuntu/Debian derivative called Elementary OS
#+BEGIN_SRC bash sudo apt install -y linux-headers-generic virtualbox virtualbox-dkms #+END_SRC
Then get the necessary ISOs from archive.org or the mirrored links here
https://archive.org/details/win-95-osr-2 will likely need this as well unless you have an incredibly slow
computer: https://archive.org/details/fix-95-cpu-v3-final
Then If you want more than 16 colors: https://archive.org/details/vesa_graphics_drivers_iso
Create your virtual machine, click on new:
If you name your VM windows 95 it will autoselect Microsoft Windows in Type and Windows 95 in version, if
you name it something different just use the drop-down menus.

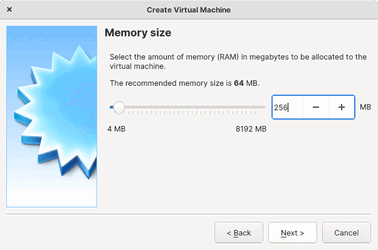
Click next, and choose your memory size, Windows 95 has a memory limit of about 480 MB, this would be an
insane amount of memory for its day, I would pick 256.
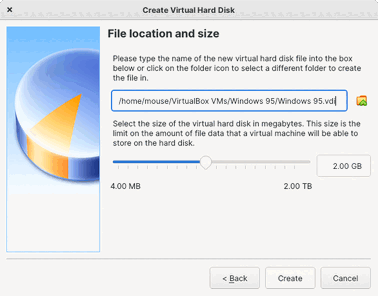
Click next, create a hard disk, 2GB is essentially the max for windows 95, which is about the size I
suggest.
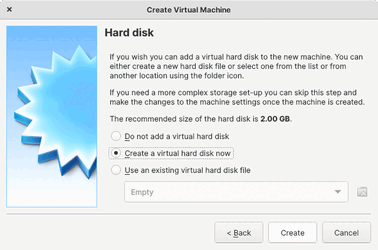
Go ahead and pick VDI as type
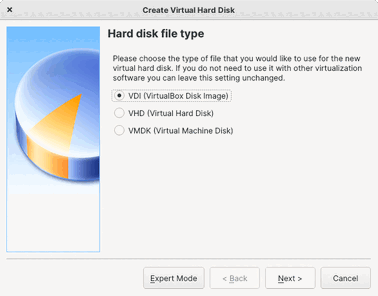
I picked fixed size to avoid any possible issues with FAT and because it is only 2GB
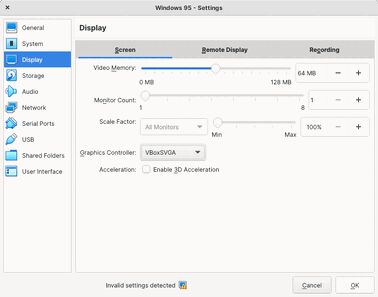
Now to set some settings for the VM
Click on display and pick 32,64 or 128 MB for the display memory also set the graphics controller to
VBoxSVGA
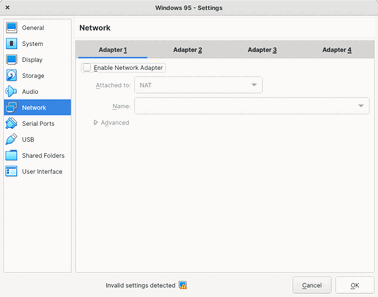
Next select network and go ahead and unclick network adapter, I would recommend not having one... If you
know better you will know what to do for this step
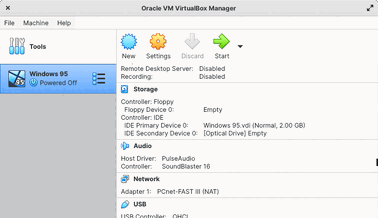
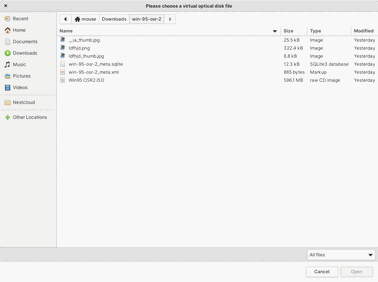
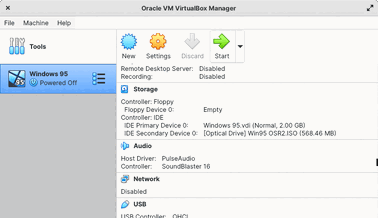
Now lets get ready for installation, click on the storage tab
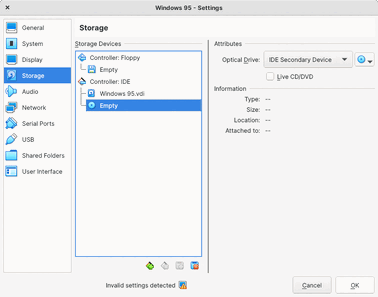
Click on the little cd now find and select the ISO we downloaded from archive.org for Win95 OSR You might
need to click view all files, for some reason VirtualBox doesn't want to see uppercase ISO on my machine
at least:
Now click OK on the settings window
Now to boot, click on the start button with windows 95 highlighted, if you get a complaint about vboxdrv
not loaded:
#+BEGIN_SRC bash sudo modprobe vbox #+END_SRC
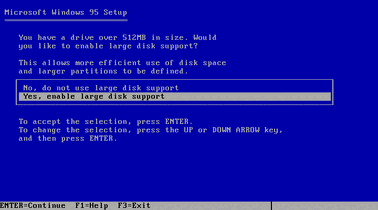
Begin windows 95 install as normal, Enable large disk support
Just press enter, we are using the CD we do not need a boot disk

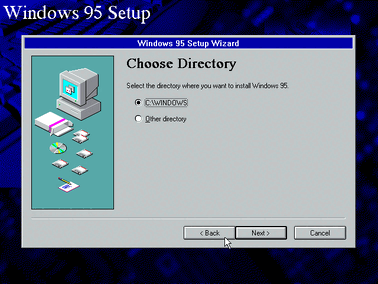
Reboot - press enter to perform checks, now just step through the Install
Select Install location(this is probably it and no need to change)
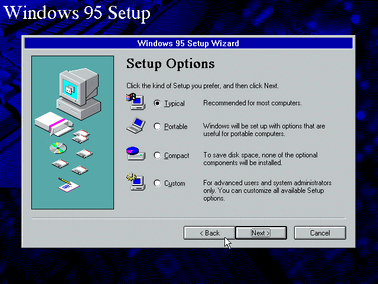
I just pick typical - you can choose otherwise
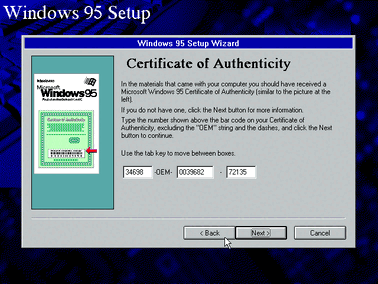
The OEM key is on the archive site description image, enter it here, also here is the OEM key here
34698-OEM-0039682-72135
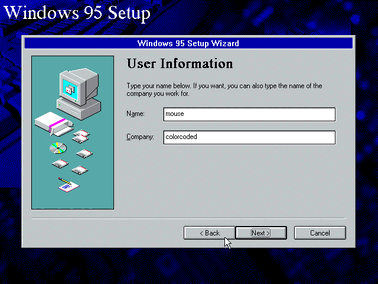
Enter what you like for name and company
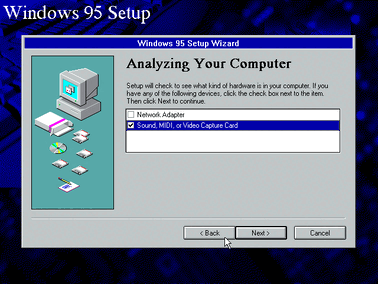
I checked Sound, MIDI, or Capture card -- did not check network adapter
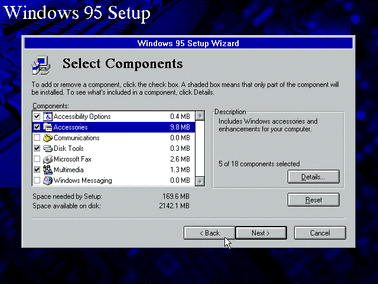
I select choose components rather than most common, mostly to remove any communication tools
I picked no on the startup disk, because we can mount the VDI Image like so:
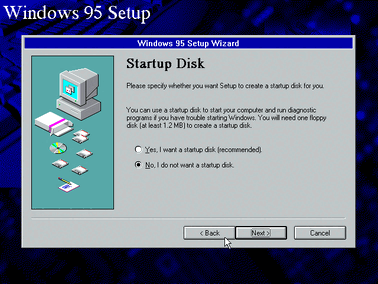
mkdir devs mkdir win95 vboximg-mount --list
vboximg-mount -i 079a7ef7-8bd3-4b50-afd8-3f7b556abe40 ./devs
mount ./devs/vol0 ./win95/
umount ./win95
umount ./devs
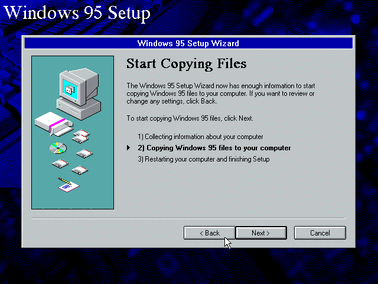
Continue install
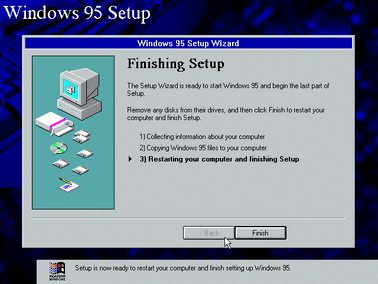
Unmount the windows disk image: Devices -> Optical Drives -> Remove Disk from virtual drive
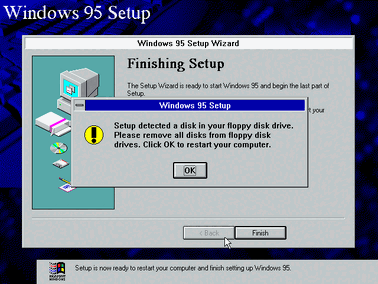
Then click finish
When you reboot you will get Windows Protection Error
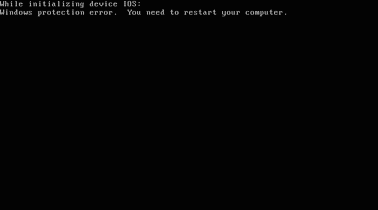
this is where the FIX95CPU.ISO comes in, insert this disk via devices menu and reset the virtual machine:
Devices->Optical Drives->Choose Disk File Then pick the ISO from the file picker
Then click on Machine->Reset
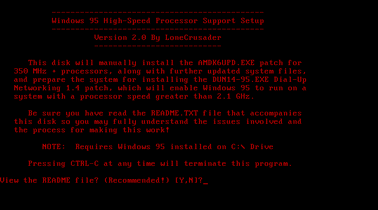
View the readme or dont\
Remove the disk and reset
Select start normally - Safe mode isnt needed this is just because of the previous error which we just
fixed
Now just step through the config
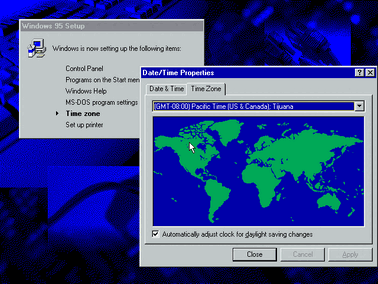
You probably don't have a printer, just hit cancel
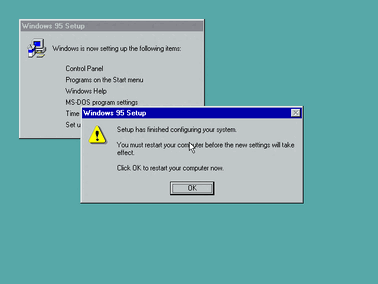
Now Restart again!
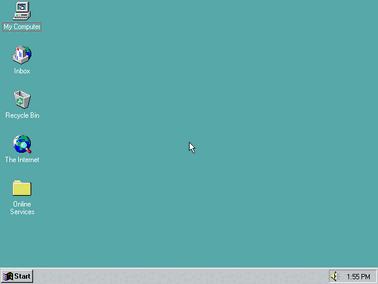
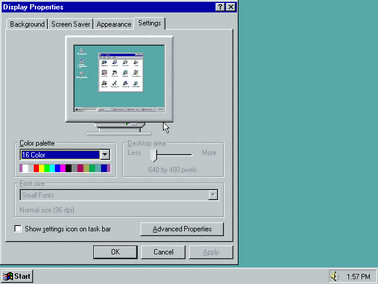
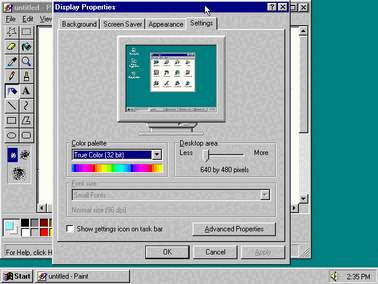
Now you have a fresh windows 95... one issue is 16 colors
Insert the vesa.iso into the virtual drive Devices->Optical Drives->Choose Disk File
Right-click Desktop and select properties
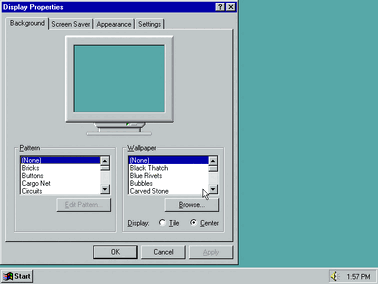
Select settings and click Advanced Properties in Bottom Right
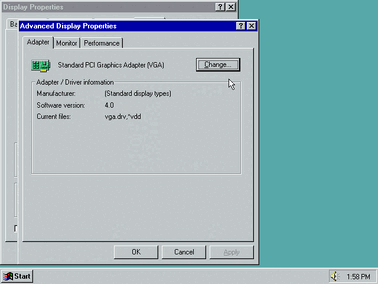
Click Change
Then click Have Disk
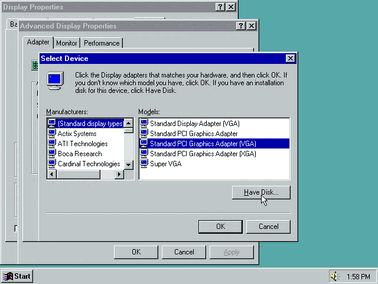
Browse or type it in
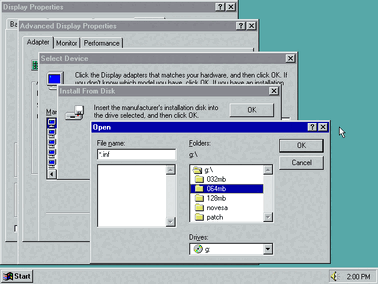
You want to pick the folder that is equal to the amount of memory you dedicated at the beginning of the
VM configuration.
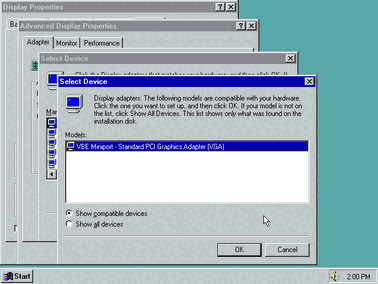
Select OK and then The Vesa Graphics Adapter will show up, click OK
Then click Apply
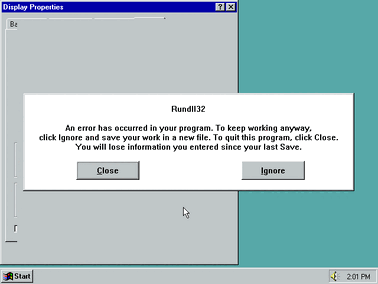
You will get this Rundll32 Error, just click Close or Ignore then reboot your machine
You might get the select SAFE MODE screen again, just select normal
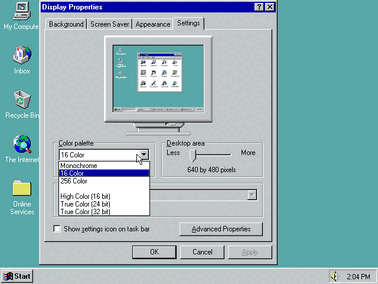
now right click properties and get your colors
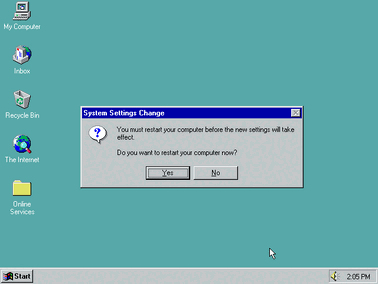
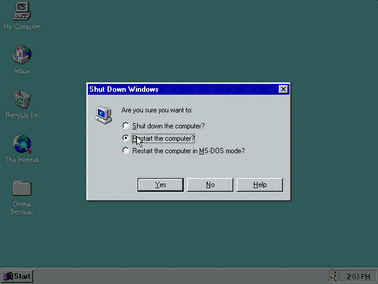
Gotta reset for everything its windows 95, restart your computer
There we go, now you have a beefy full-color windows 95 you can play games at fast forward on!
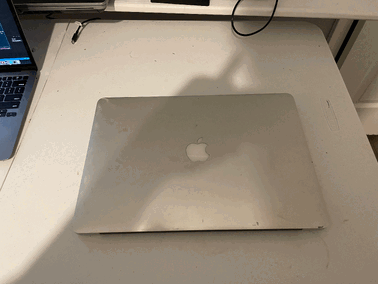
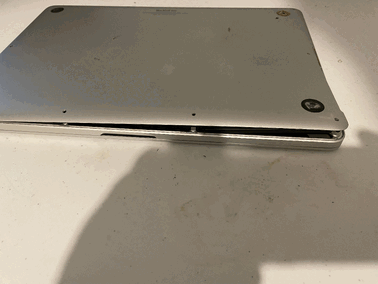
MacBook A1398 Mid 2014 Battery Change
This is the Laptop I’ve received.
Notice the preggers battery
First gonna wipe down the outside. Here Is the battery I purchased amazon link,
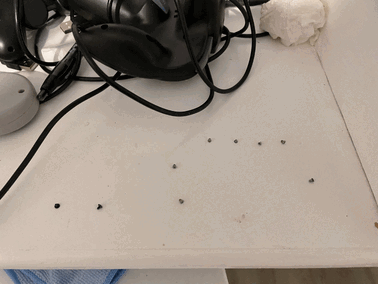
and there’s the rag I wiped it down with. It came with the screwdrivers, time to check if they
fit, then remove the bottom if they do.

Arrange your screws, don’t want too long screw, as Louis would say. The blue driver fit, Ewww
dirty.
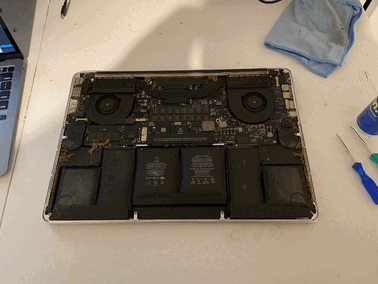
The green fit the internal screws for the battery removed the service sticker >~< Pulled up and towards
me to disconnect the cable.
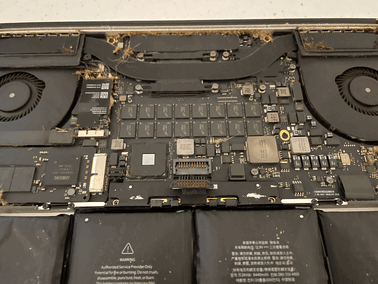
Removing with a plastic spatula haha… it's working.

Successfully removed, took a little force, but worked in the end
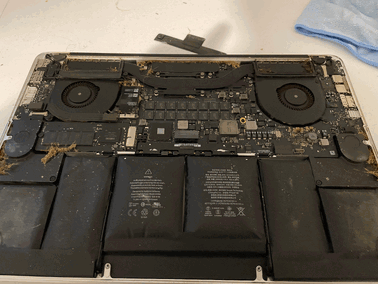
Now I'm gonna wipe down the inside a little for this dust, not gonna go nuts
Here it is, now to put in the new battery.

It took a lot of force to get it in.. and the ribbon end is a little long, hopefully, the
connector is fine, gonna not glue it down, the case and screws should hold it
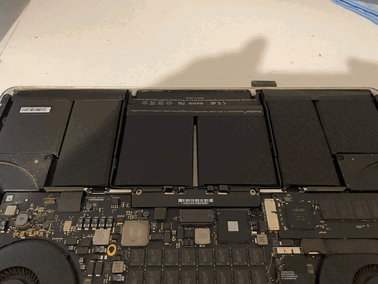
And don’t forget to get the inner screws first as I did
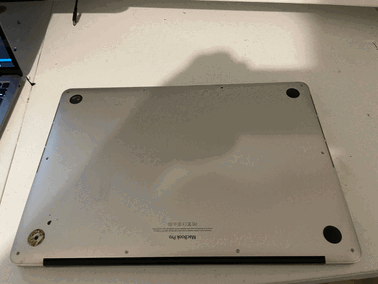
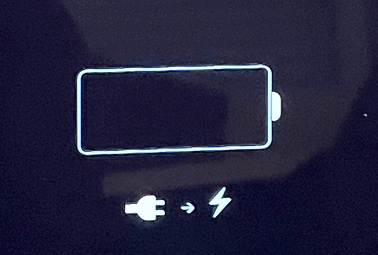
Screws all replaced, now for the moment of truth…
… Gave me a low battery message right off the bat, it told me to install and then drain to
10 % hmmm…
So opening back up to check the connector
So the connector was all fucked up, and the connections for the pins bent… I had to pry
them back open with a screwdriver oi vey, so it's holding a charge
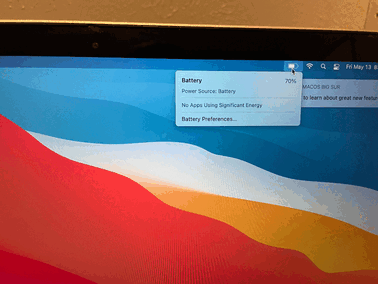
So for the calibration steps, I am going to stay using macOS, need to discharge to 10%, and
charge 5 times Use caffeinate command to keep it awake for the discharging process
Making a MacBook A1398 Useful
Well, macOS is dropping intel support. So let's make this machine useful. I will be installing Windows,
and Linux, and maintaining a small macOS drive simply for firmware and blessing, and possibly nostalgia
in 20 years from now. The disk size is 1TB.
First I downloaded a Windows 10 ISO and then opened up boot camp.
Selected the first options and inserted a USB drive, setting the windows partition size to whatever you
think is best.
Installation proceeded uneventfully, cant connect to the internet during installation, and Bootcamp
installation ran after the first login.
Reboot into macOS, add partition size of whatever you want to dedicate to Linux(this is mostly to safely
resize/add partition), leaving a 100GB partition left for macOS is what I did. This rest will be used
for a linux installation.
Go to arch site and grab the install CD https://archlinux.org/download/
Insert your USB stick, find the necessary device name using:
Then unmount the disk or else dd will complain:
sudo diskutil unmountDisk /dev/disk8
Then get to dd-ing
sudo dd if=/Users/anon/Downloads/archlinux-2022.05.01-x86_64.iso of=/dev/disk8 bs=4M
Note , disk8 is my disk, yours will likely be different
Restart and hold down option, choose your disk - efi boot will probably be its name, with a yellow
external disk casing look.
Your main issue is gonna be getting an initial internet connection, I have a dongle that will hopefully
work. It worked, I used a panda wireless device, connected to network using iwctl
I deleted the partition we made to shrink the apfs container, added a 1GB ext4 partition, ended up as
part number 2. I did not create an ESP/EFI partition, but rather used the one I have been using
throughout the earlier steps.
Then used the rest for btrfs, this is for multiple reasons, 16 GB ram being one, and if I need swap,
btrfs now supports swap pages.
Encrypt and Create parts
cryptsetup luksFormat /dev/sda5
cryptsetup luksOpen /dev/sda5 cryptroot

mkfs.ext4 /dev/sda2
mkfs.btrfs /dev/mapper/cryptroot

mount -o noatime,discard,ssd,defaults /dev/mapper/cryptroot /mnt

cd /mnt
btrfs subvolume create __active
btrfs subvolume create __active/rootvol
btrfs subvolume create __active/home
btrfs subvolume create __active/var
btrfs subvolume create __snapshots
btrfs subvolume create __snapshots/root
btrfs subvolume create __snapshots/home
btrfs subvolume create __snapshots/var
cd
umount /mnt
Mount all volumes for install
mount -o noatime,discard,ssd,defaults,subvol=__active/rootvol /dev/mapper/cryptroot /mnt
mkdir /mnt/.snapshots
mount -o noatime,discard,ssd,defaults,subvol=__snapshots/root /dev/mapper/cryptroot /mnt/.snapshots
mkdir /mnt/{home,var,boot}
mount -o noatime,discard,ssd,defaults,subvol=__active/home /dev/mapper/cryptroot /mnt/home
mount -o noatime,discard,ssd,defaults,subvol=__active/var /dev/mapper/cryptroot /mnt/var
mkdir /mnt/home/.snapshots
mkdir /mnt/var/.snapshots
mount -o noatime,discard,ssd,defaults,subvol=__snapshots/home /dev/mapper/cryptroot /mnt/home/.snapshots
mount -o noatime,discard,ssd,defaults,subvol=__snapshots/var /dev/mapper/cryptroot /mnt/var/.snapshots
sync

mount /dev/sda3 /mnt/boot
mkdir /mnt/boot/efi
mount /dev/sda1 /mnt/boot/efi
sync
For my pacstrap I picked the following:
pacstrap /mnt base base-devel linux linux-firmware nano btrfs-progs efibootmgr grub broadcom-wl netctl wpa_supplicant dhclient dialog mesa refind
For modules to load,dm_crypt, wl(Broadcom) as well as nouveau(this will also work out for the OPTIMUS
switching better than loading i915), for HOOKS add encrypt after block
Install grub:
grub-install --target=x86_64-efi --efi-directory=/boot/efi --recheck
Set default grub config(edit /etc/default/grub):
GRUB_CMDLINE_LINUX_DEFAULT="cryptdevice=/dev/sda5:cryptroot root=/dev/mapper/cryptroot rootflags=subvol=__active/rootvol quiet"
Generate config:
grub-mkconfig -o /boot/grub/grub.cfg
grub-mkconfig -o /boot/efi/EFI/arch/grub.cfg
Then to top off everything making the systems functionality just easier for all the OS’s I ran
refind-install
You should now have an autistic triple boot system
Addition notes:
- Horrible sound? Try easyeffects :
https://forum.manjaro.org/t/howto-enhance-your-linux-audio-with-easyeffects-or-pulseeffects-legacy/82497
, https://gist.github.com/sebastian-de/648555c1233fdc6688c0a224fc2fca7e
- MultiMonitor setup is painless in gnome, its vaguely painless in xfce4, but for some reason the
resultant setup is slow as molasses
- The Nvidia parts can probably be better soon and now